
Google Tag Manager Cheat Sheet
Traditionally, best practices state that to be able to track contact form submissions a website needs to direct the user to a ‘thank you’ page, that is, a page which ‘thanks the user for their enquiry’ and lets them know that ‘you will respond promptly’. The general idea is that you place some conversion code on your ‘thank you’ page knowing that the only way people can reach that page is by submitting an enquiry form.
The difficulty in tracking enquiries is that more often than not, most websites don’t have this set up in place, in fact, for the most part a lot of websites I see the process is: enquiry from submitted –> ‘thank you for your enquiry’ image appears in place of the form. The issue here is that with this set up, we cannot track the enquiry very easily.
Enter Google Tag Manager. The form submit listener allows the digital marketer to track form submits by listening to the form submission and reporting on it into Google Analytics. It allows us to track form submissions without needing to run conversion code on a ‘thank you’ page. It simplifies the entire process, so here is the step by step on how to set this up:
After setting up a Google Tag Manager account: www.google.com/tagmanager/ follow these steps…
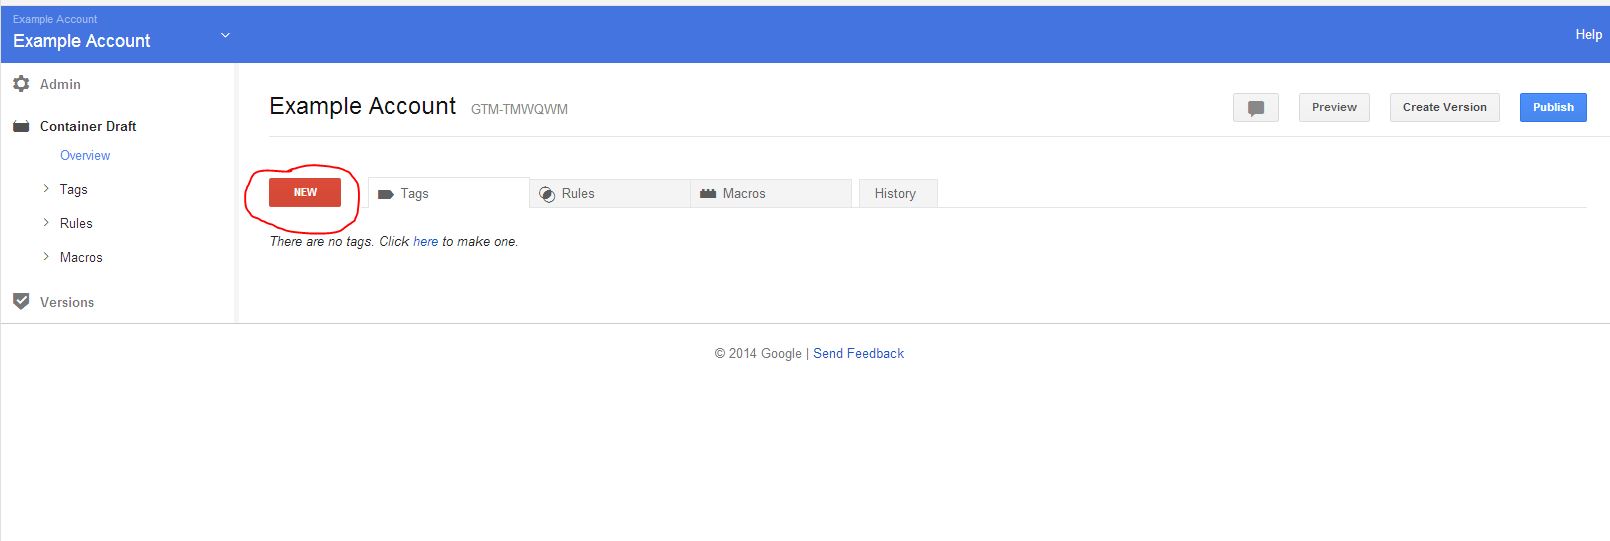
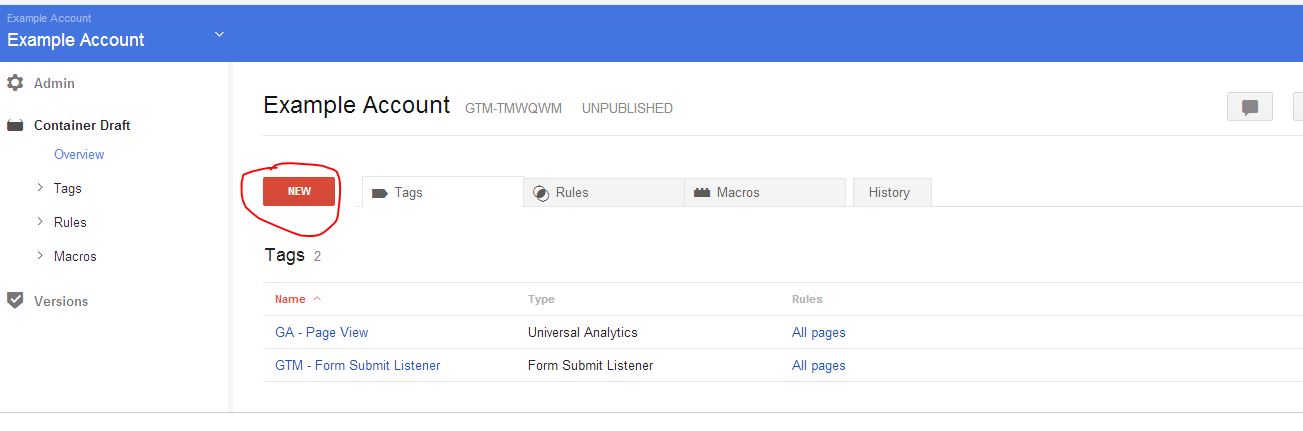
Step 1. Create a new tag.
Step 2. Create an event listener – Form Submit Listener Tag
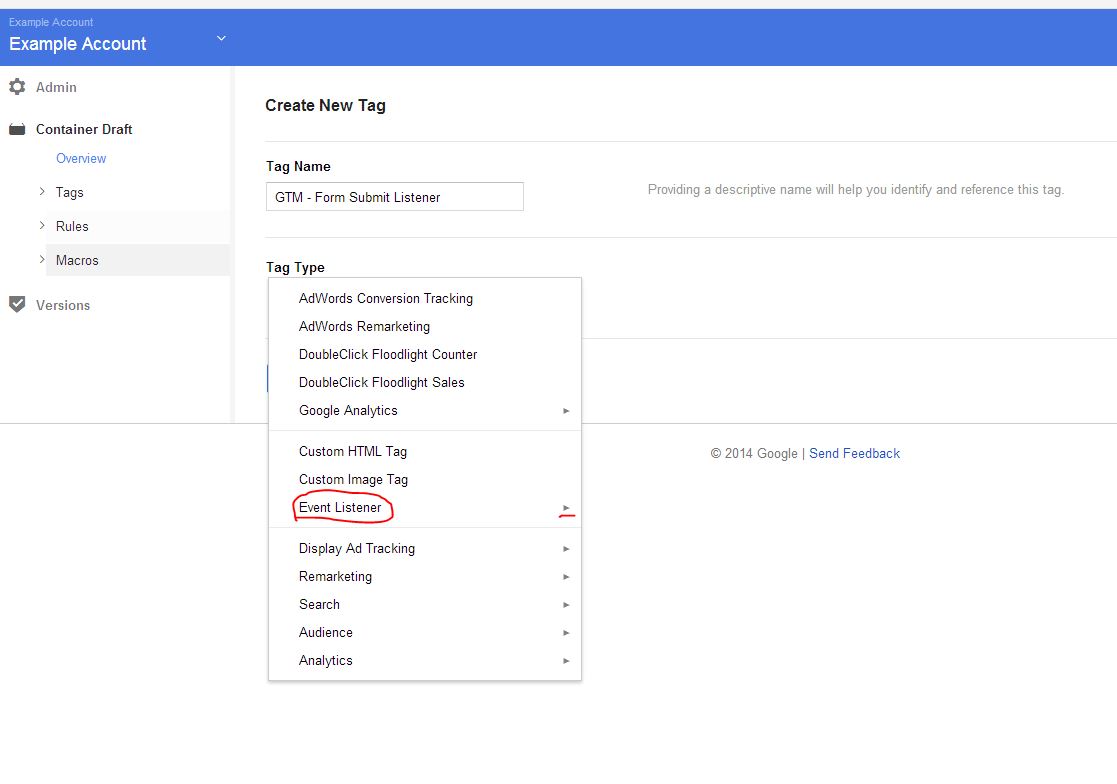
Click – Wait for tags and un-tick Check Validation

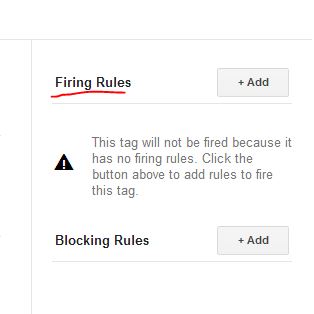
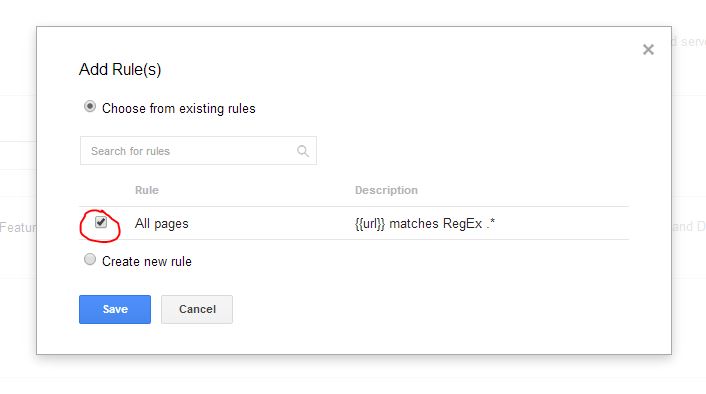
Step 3. Firing rule – All Pages
Step 4. Save tag.

What this does is tell Google Tag Manager to ‘Listen’ to any form submits on every page of the website. The reason we want to listen on all pages is that in the future, if you decide to place a new form on a new page of the website, we’ll already be listening to it. With the all pages rule it means that we don’t have to remember what has been previously done… It kind of future proofs the event listening for us.
What we need to do from here is tell Tag Manager to report that information into Google Analytics.
Reporting Tag:
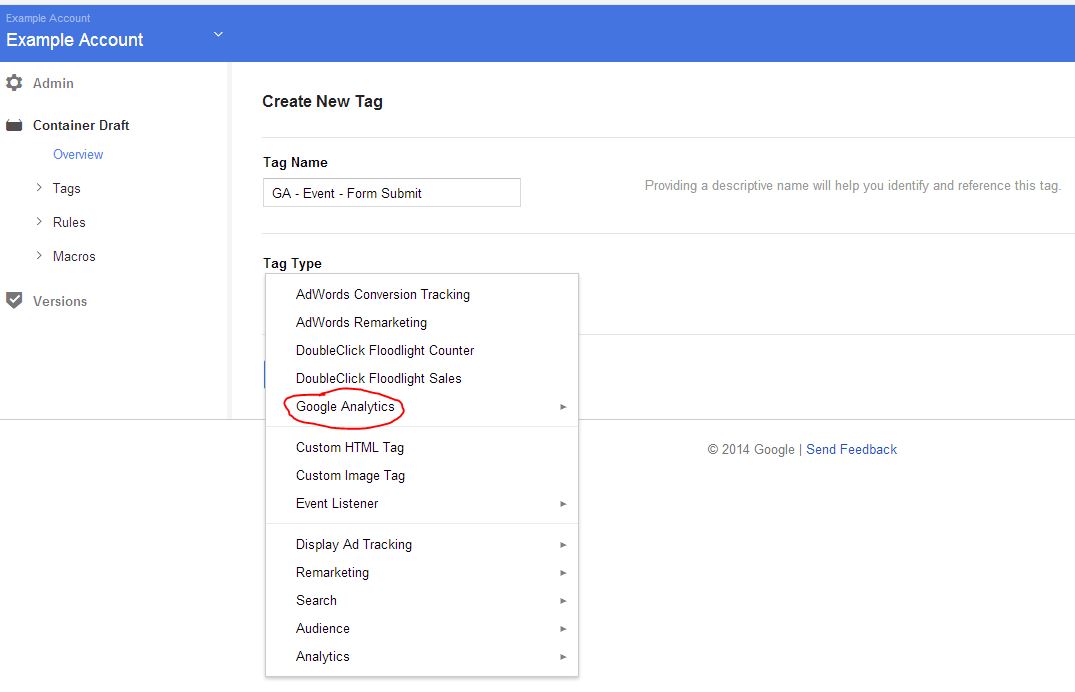
Step 5. Create Tag.
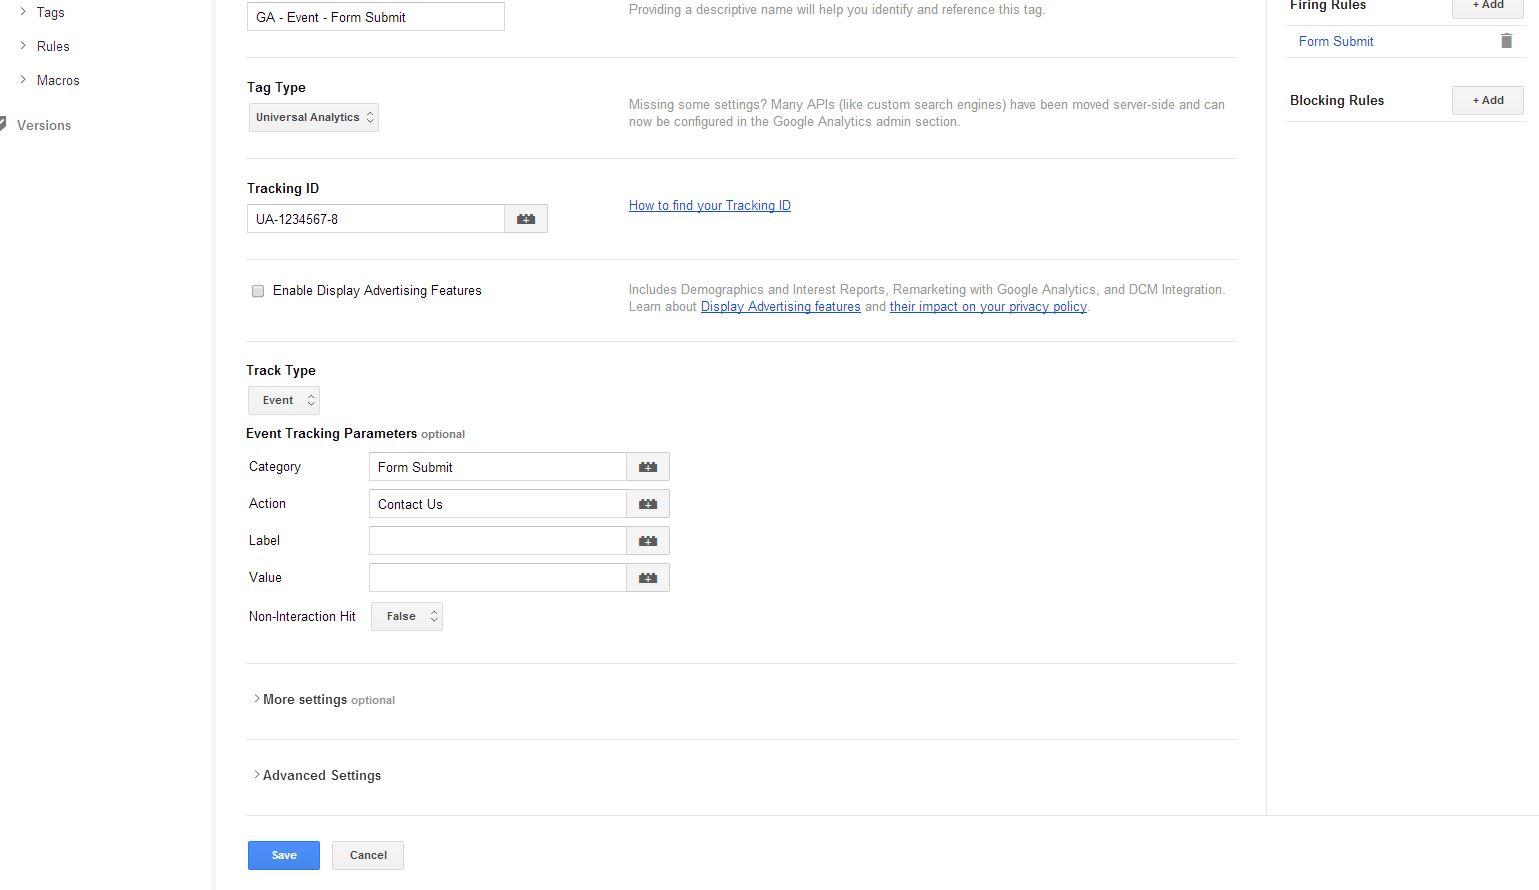
Step 6. Create a Google Analytics tag to report on the information. Click Universal Analytics.
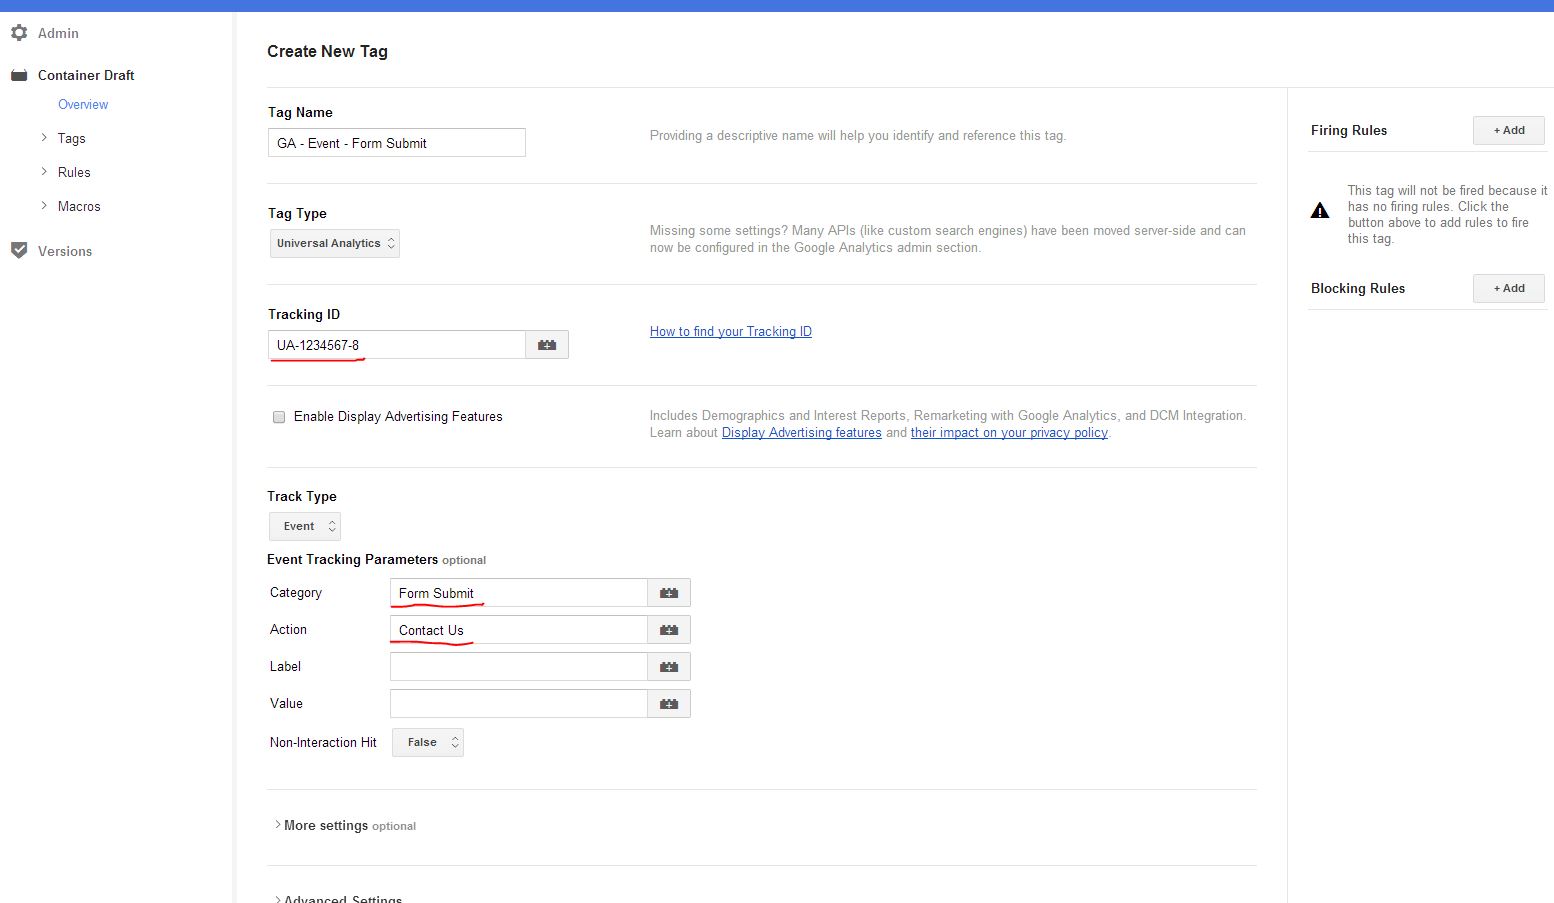
Step 7. Tell the tag how you want to label it in analytics.
Step 8. Create the firing rule

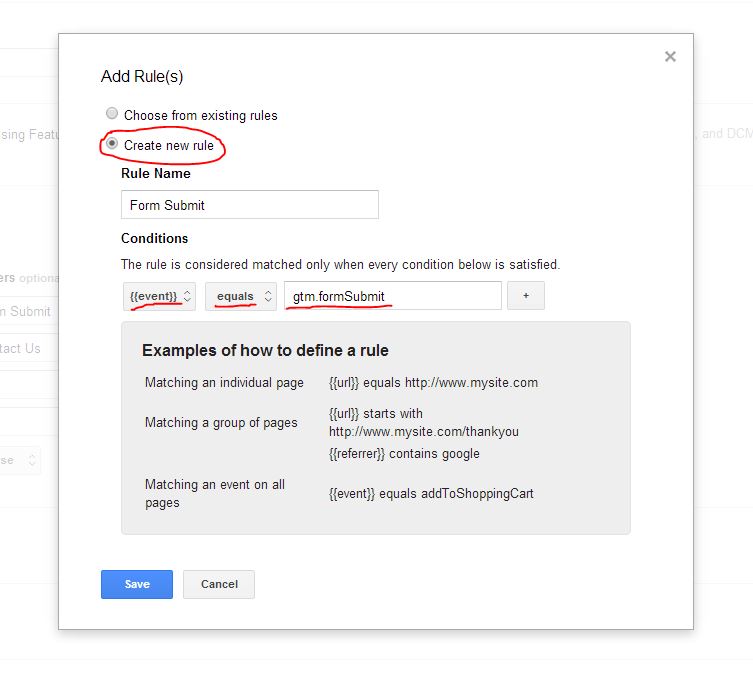
The rule is: Event – Equals – gtm.formSubmit
This firing rule can actually be found back in Step 2 when you’re selecting the event listener tag. The text on the right hand side of the listener tag tells you exactly what you need to do to get the tag to fire and work.
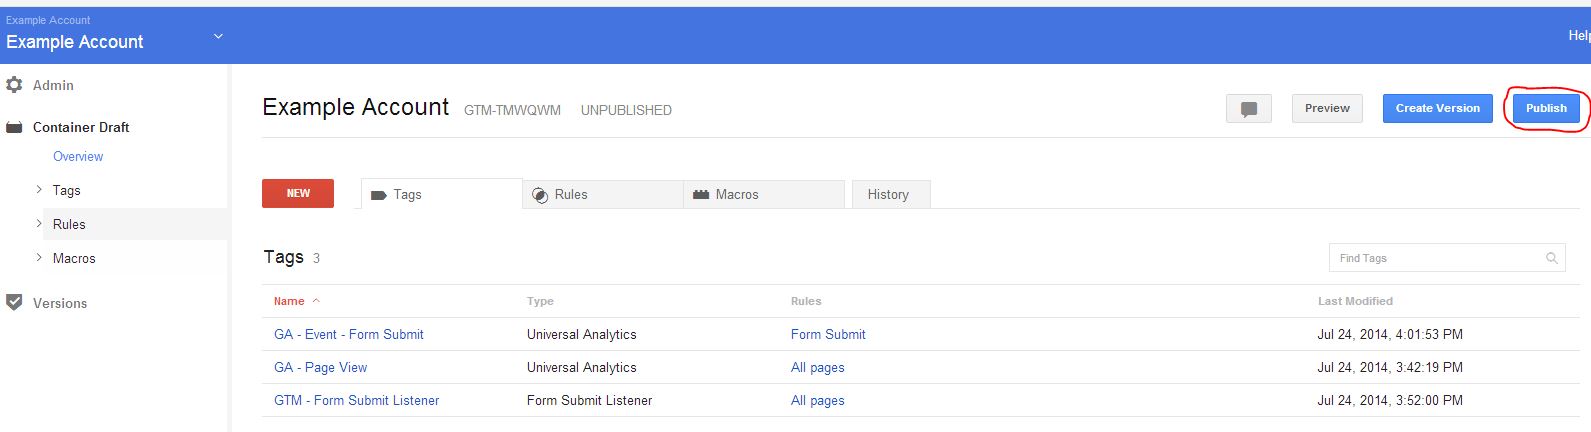
Step 9. Save Tag and publish
Step 10: Publish your container!
Step 11. Everything we’ve set up reports in Analytics under Behaviours > Events > Overview
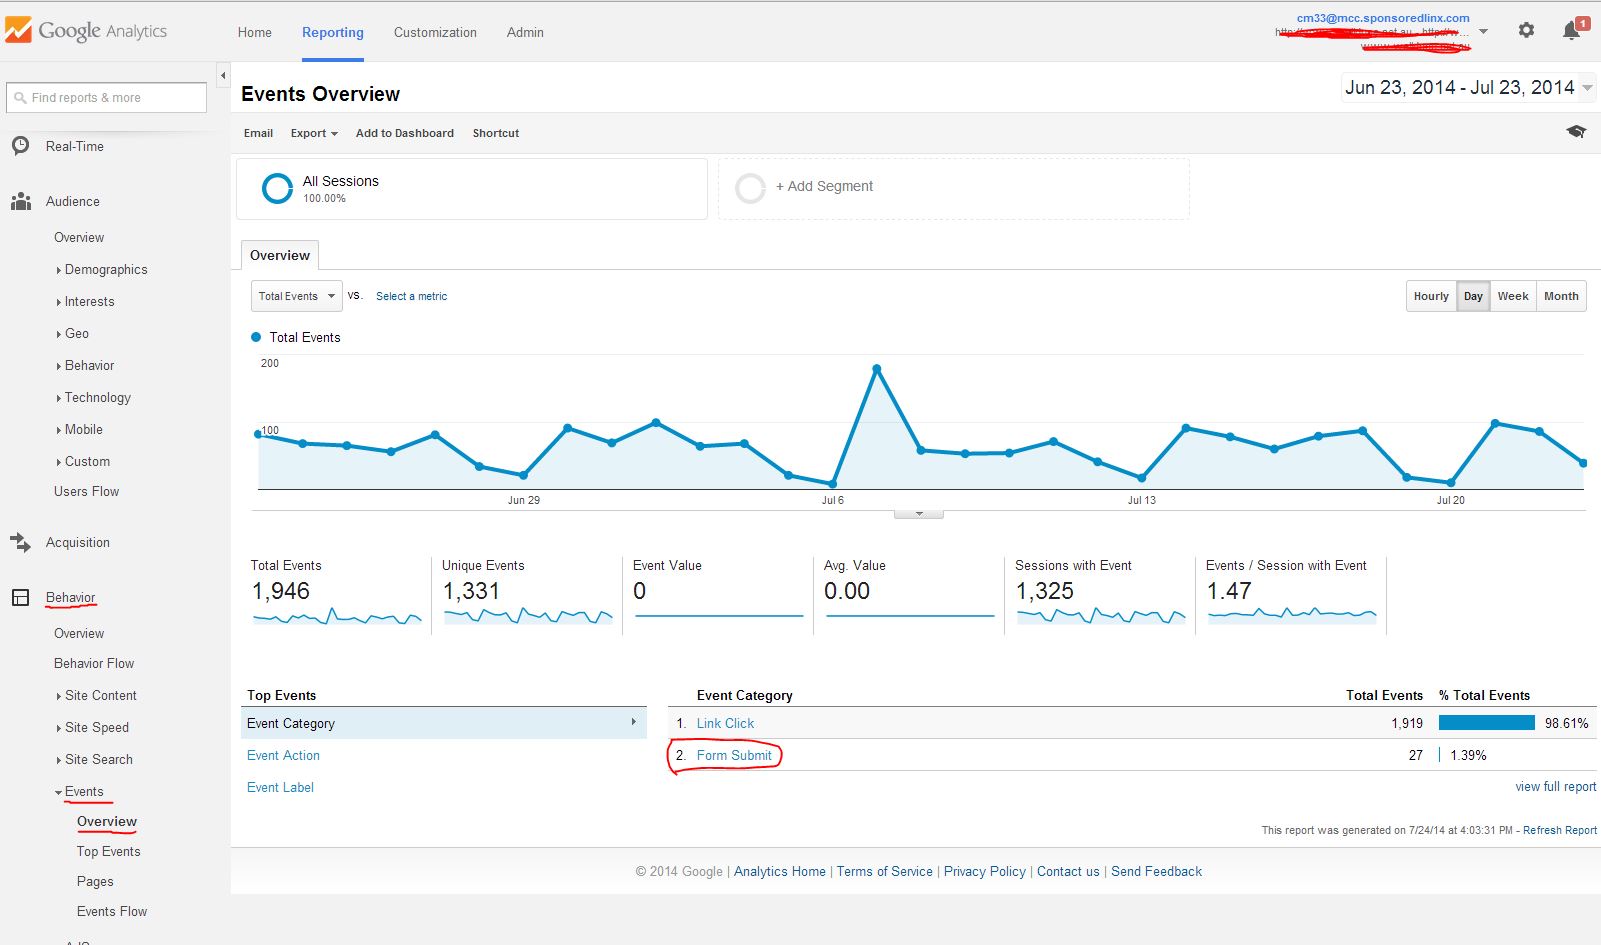
It’s that easy! Setting up your event listener and form submit listener can make life very easy in the long run and can allow you to be more flexible in your tracking and reporting functions. Just give it a go!